Final Product What You'll Be Creating

Step 1
First prepare your assets. Install the Pieces of Eight font onto your computer and open both .PAT files. Finally open the "background-img.jpg" which is 600×400 px and will be your workspace.
Step 2
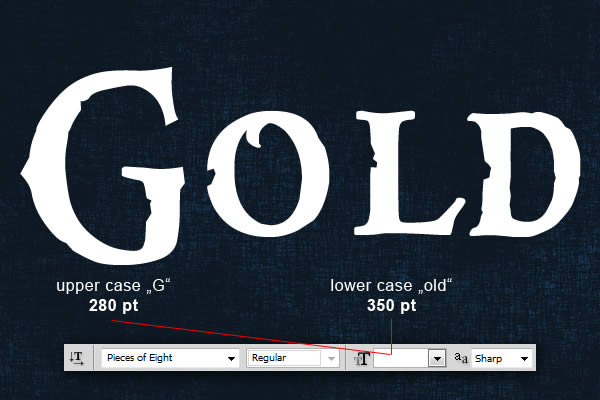
Now we can start making our first text effect. First choose the type tool and change font to Pieces of Eight, size should be around 280 pt for letter "G" and around 350 pt for the rest of letters with anti-aliasing set to Sharp as seen on picture below. Now type your text somewhere in the center of the image. You can write any word, but in this tutorial I’ll use "Gold".
Step 3
We are ready to start with our text style. Go to Menu > Layer > Layer Style > Blending Options and use the settings below. You can also access Blending Options with two faster ways. First and the fastest way is to double click on the layer in your layers menu. Other way is to right click on the layer in your layers menu and choose Blending Options. When you are done with all the settings below, don’t forget to hit "OK" in the Blending Options window! This text layer will add the main gold text effects into the final result.

Step 4
Now duplicate our "Gold" text layer so the duplicated layer will be above the original one. First we clear the previous style on this duplicated layer by going to Menu > Layer > Layer Style > Clear Layer Style then we start a new one by going to Menu > Layer > Layer Style > Blending Options and using the settings below on our text. You can also use the quicker methods to access Blending Options from "Step 3" of this tutorial. When you are done with all the settings below, don’t forget to hit "OK" in the Blending Options window! This text layer will add the depth into the final result.
If you are happy with this result, you can be done with this tutorial, but in next steps I will add more flare to the final effect.

Step 5
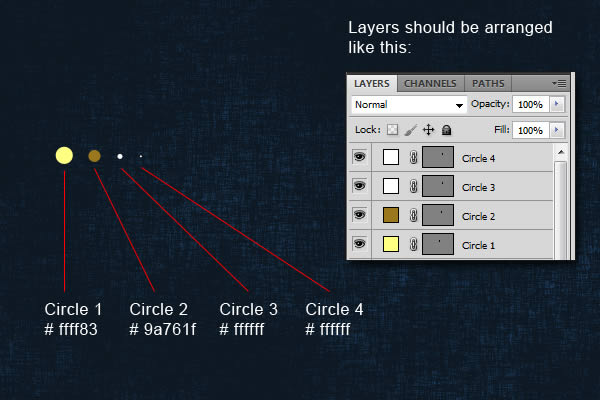
Now we will create lighting dots. We start with one and will duplicate as many as we will need. So for now, you can hide both text layers to have clear workspace. Choose the "Ellipse Tool" and draw 4 circles around the same diameter, color and layer arrangement as on the picture below. You should also rename the layers to Circle 1, Circle 2, etc., as I will use it names in next steps.
Step 6
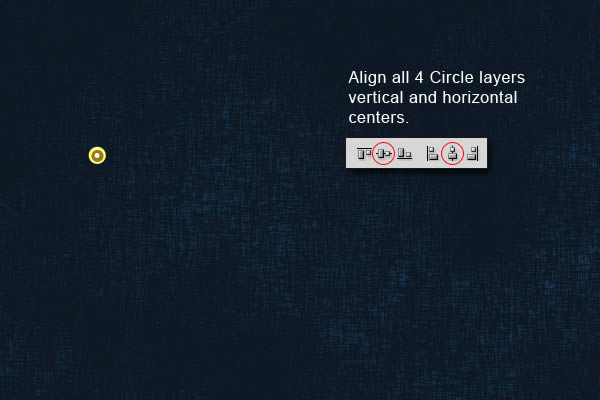
When you are done creating the circles, use vertical and horizontal centers alignment.
Step 7
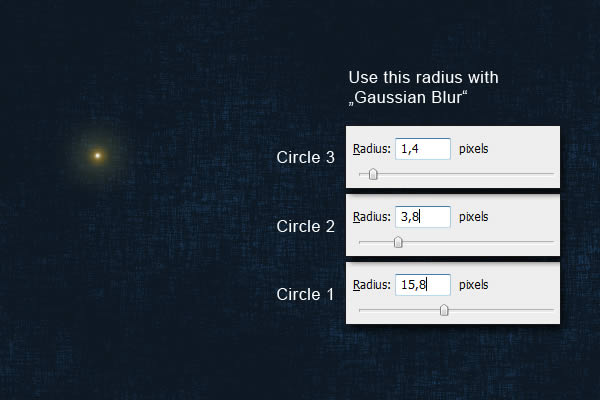
Next step is to add “Gaussian Blur” to circles 1,2 and 3. Select the “Circle 1″ layer and go MENU > Filter > Blur > Gaussian Blur and use the Radius settings from the picture below. Repeat it for Circle 2 and 3, but with different Radius setting.
Step 8
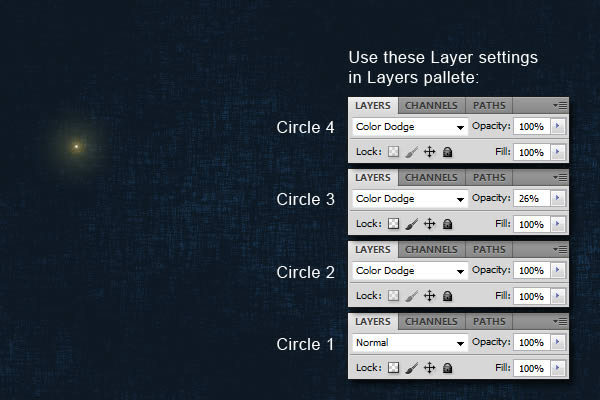
When you are done with blur, we will be doing some layer settings. Use the same layer settings as on the picture below.
Step 9
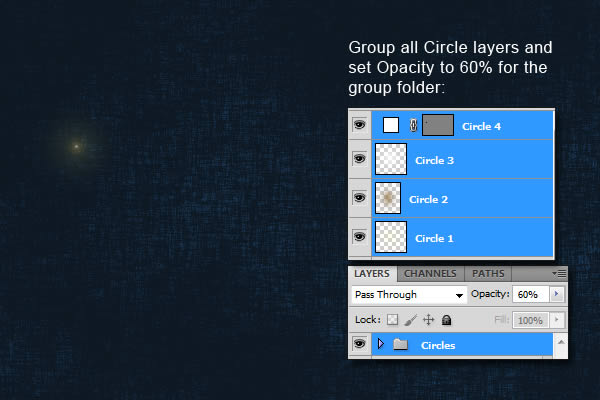
Final step in creating lighting dot is to group all 4 circle layers and set the Opacity of the Circles folder to 60%.
Step 10
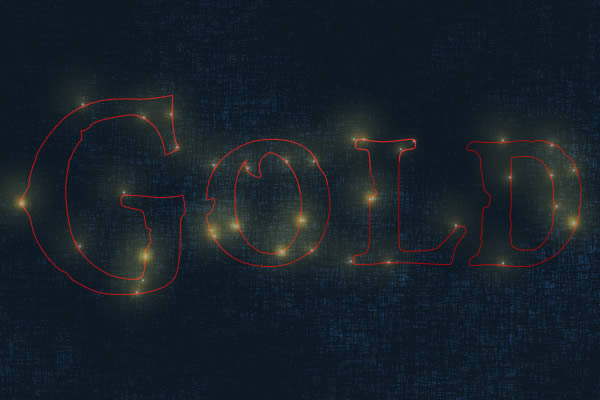
This is the fun part of this tutorial. Make both text layers visible again and move the lighting dot on the edge of the text. Duplicate the whole "Circles" folder for more dots and spread it through the whole text. On the picture below you can see the positions I used in this tutorial, but it is up to you where you want it to have them. You can see on my example that there are places which shine more then others. It is simply made by multiplying two "Circle" folders.
Final Image
Thanks and look me up on www.YouTube.com/TTGxBoeing
For more!!! Thanks
Buy Photoshop 3D Text Effect, Gold Text Styles, American Football Flyer, College Football Flyer / Sunday College Football Flyer - Print Templates, On The Regular Trap Mixtape Album CD Cover Template, TRAP COVER, Realistic Football helmet Mockup, Flyer Mock-Up and lot more
ReplyDeleteFor More Information Visit Here -- 3d metal Text Effect